• Skip to primary navigation
  • Skip to main content
  • Skip to primary sidebar

Mom With Cookies

  • Desserts
  • Recipes
  • About
  • Contact
menu icon
go to homepage
search icon
Homepage link
  • Desserts
  • Recipes
  • About
  • Contact
×
home » Desserts » Cookie Decorating

Tool Cookies for Fathers Day

by Joanna Stephens Published: Jun 15, 2019 · Updated: Dec 7, 2021 · This post may contain affiliate links. We earn commission from purchases made. ·

Sharing is caring!

  • Facebook
  • Twitter
  • LinkedIn
  • Yummly
  • Flipboard
  • Mix
  • Email
A collage of decorated tool cookies
Finished tool cookies that have been decorated

A collage of decorated tool cookies

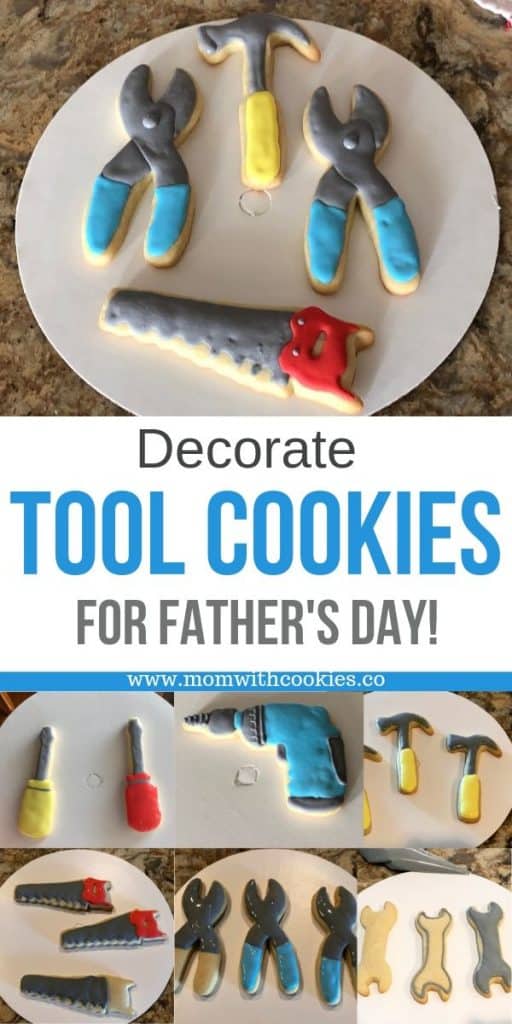
Decorated Cookies Shaped like tools

Do you have a handy-man in your life? Or perhaps someone who really does to DIY? If so, these tool cookies are sure to please!

Now, in an effort to fully disclose, this article contains affiliate links. This means if you purchase something, I would receive a commission. For more information, please see my disclosure page. 

What you need:

  • tool cookie cutters (these are the ones I used)
  • a good sugar cookie recipe
  • royal icing (gray, blue, yellow, and red)
  • piping bags

How do you keep decorated cookies from getting too hard?

Everyone has a preference for their cookies. I like a soft cookie that isn't too hard.

To do this, when you are decorating with royal icing. Let them dry in an air tight container.

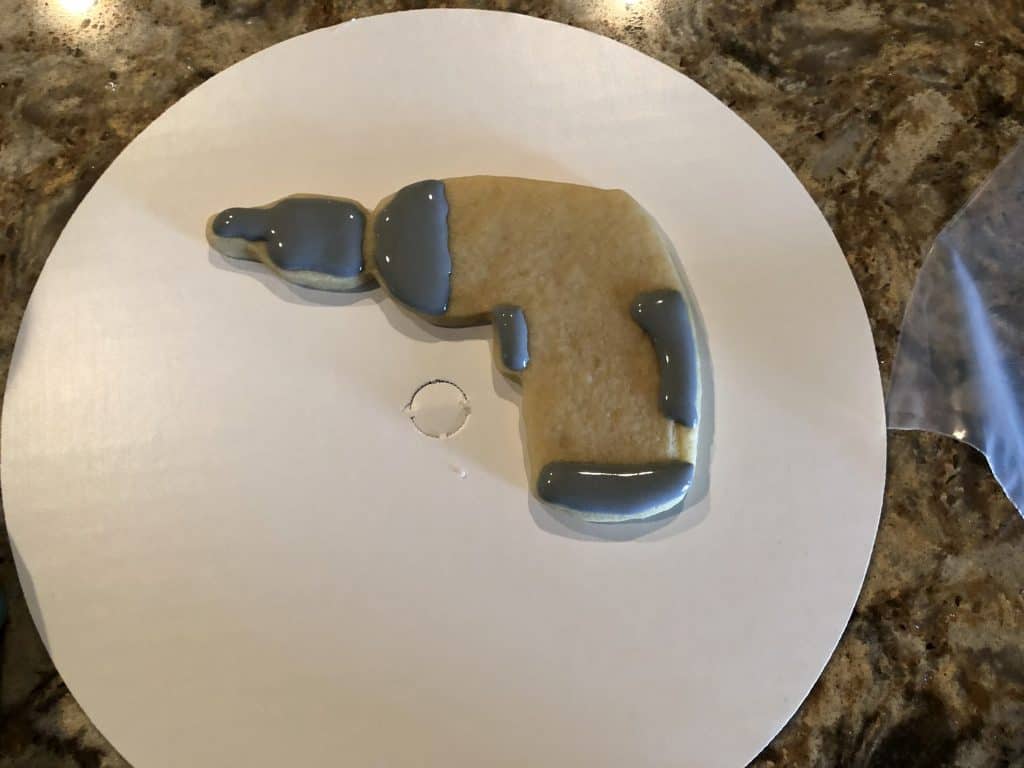
The Drill Shaped Cookie

This is one of my favorite cookies to decorate, because it's all in the detail.

You start off by first using the gray royal icing, at flooding consistency. You will pipe the shapes that will be in gray. 

First step to decorating tool drill cookies

Then you will move on to the blue icing (a flooding consistency) and pipe the areas that will be in blue.

Adding the blue royal icing to the drill cookie

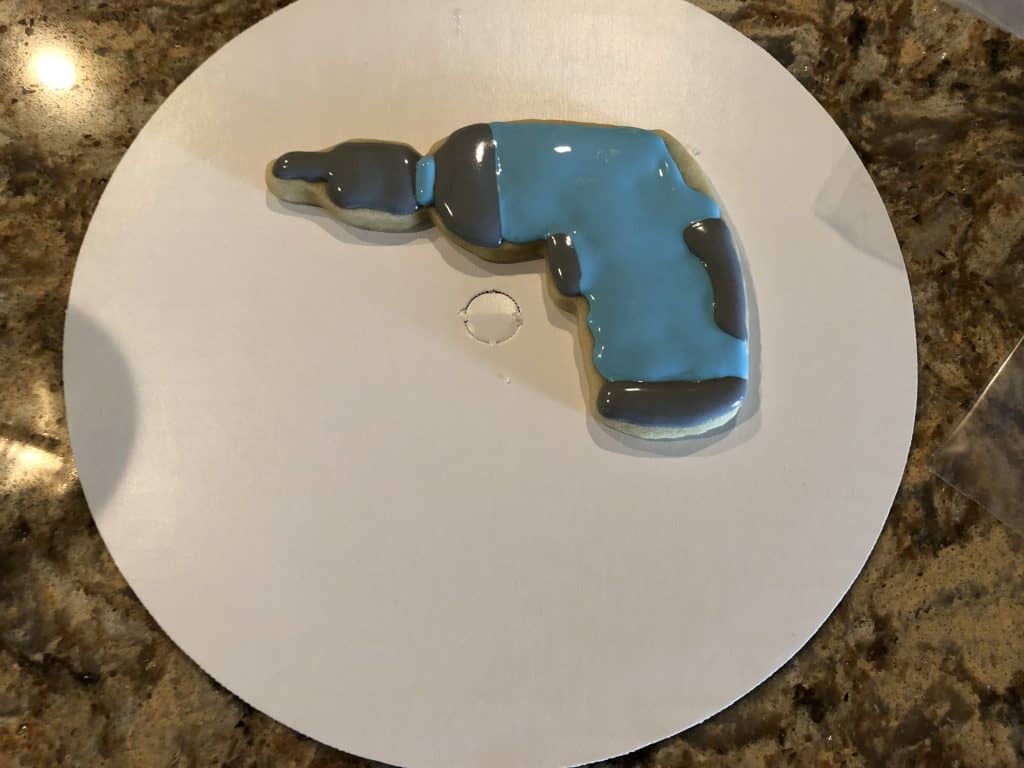
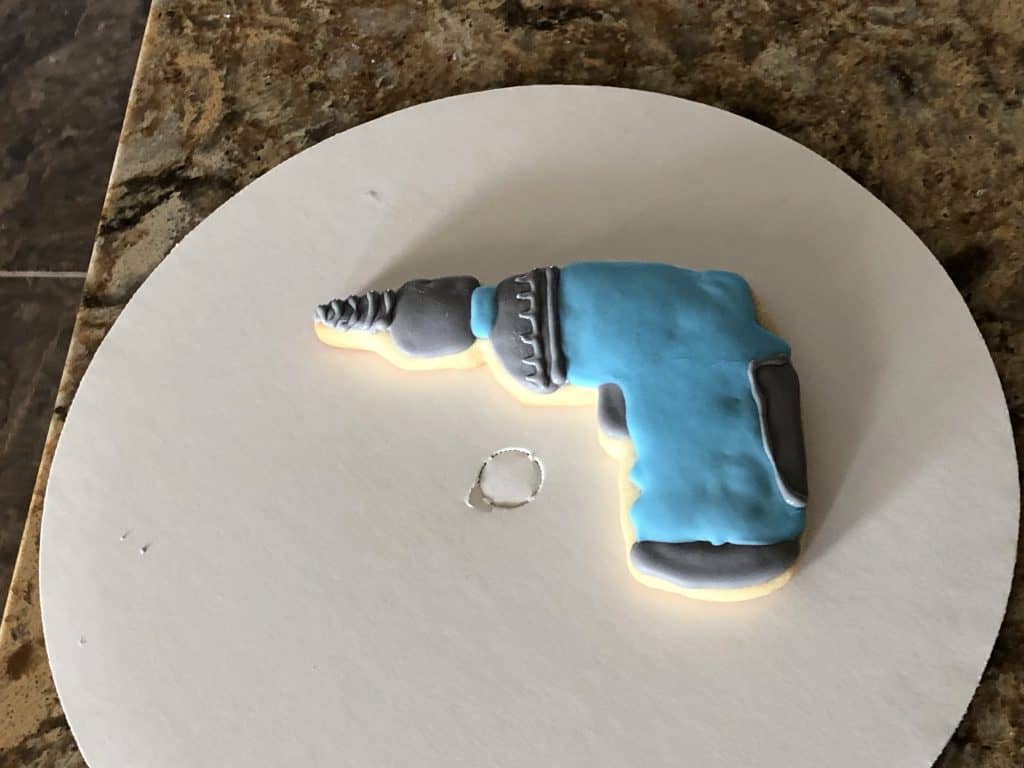
Then, let this set up for an hour or so before adding the finishing touches. Finally, let them dry overnight until the icing is firm.

Adding the final detail to the drill cookie

The Hammer Cookie

While the drill cookie is a little bit more challenging, you will be happy to know that the hammer cookies are a breeze! 

First, use the yellow icing (flooding consistency) to decorate the handles of the hammer.

Decorating the hammer shaped cookie with yellow icing

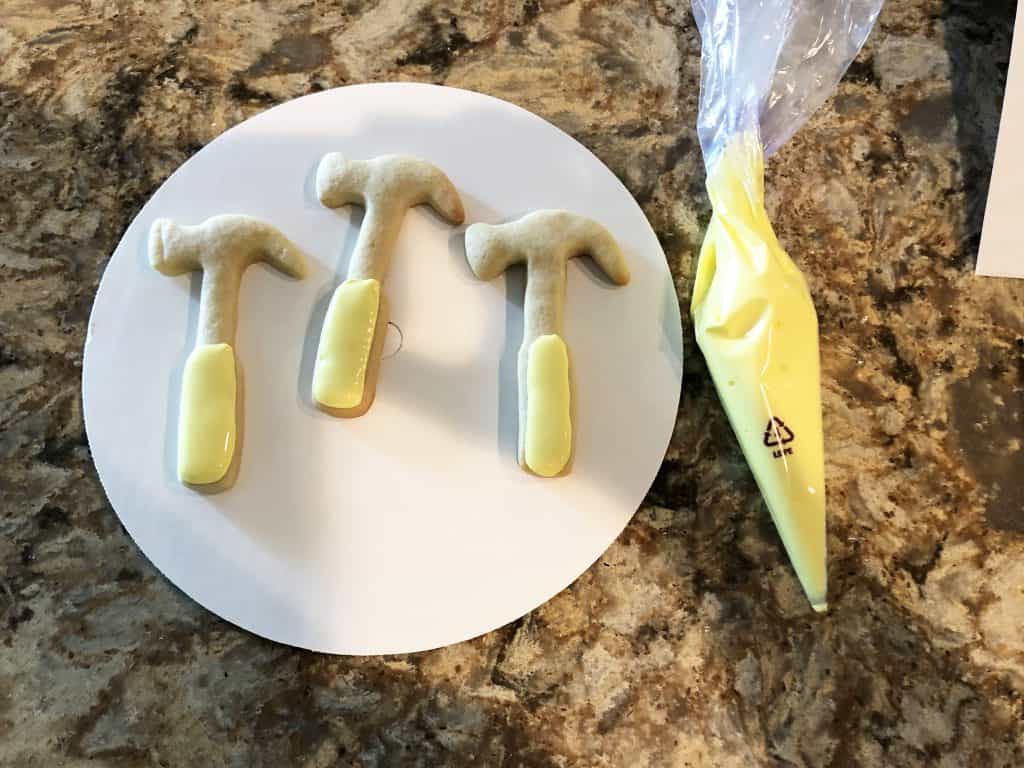
Then, using the gray royal icing at flooding consistency, decorate around the rest of the hammer.

Adding the gray icing to the hammer cookies.

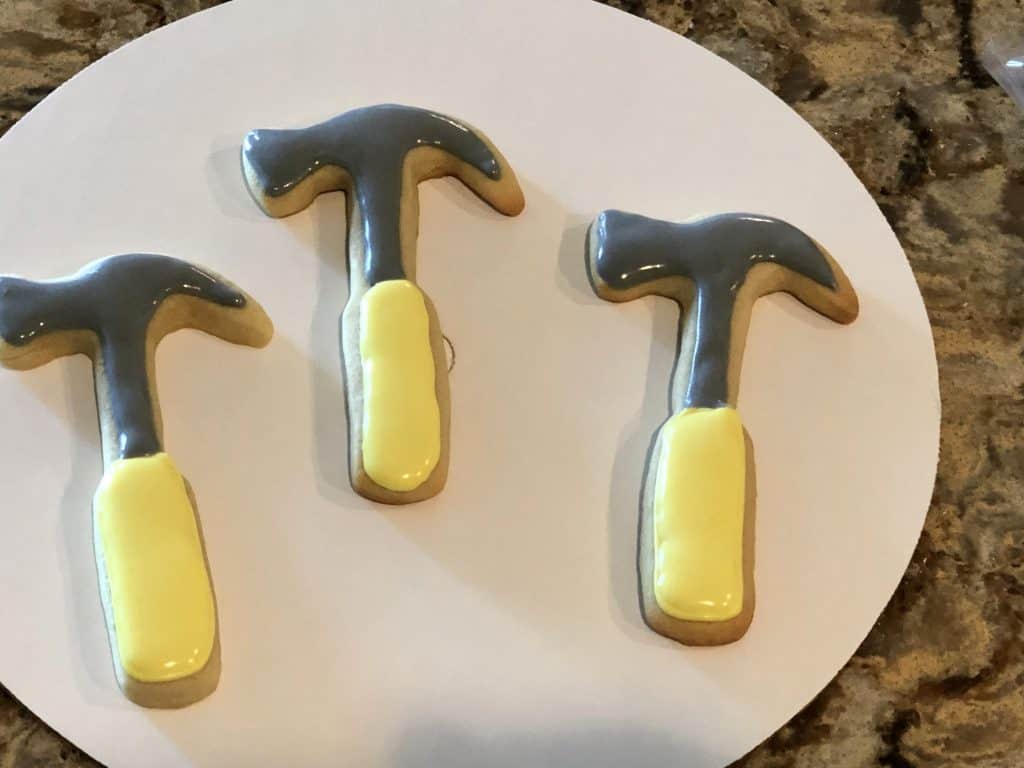
Let these dry for a couple of hours until the icing is hard. If you can wait, let them dry overnight for the best results.

Wrench Shaped Cookies

Another super easy tool cookie to decorate is a wrench. All you need is one color. First outline the cookie with your gray royal icing (flooding consistency) and then fill it in.

Decorating wrench shaped cookies

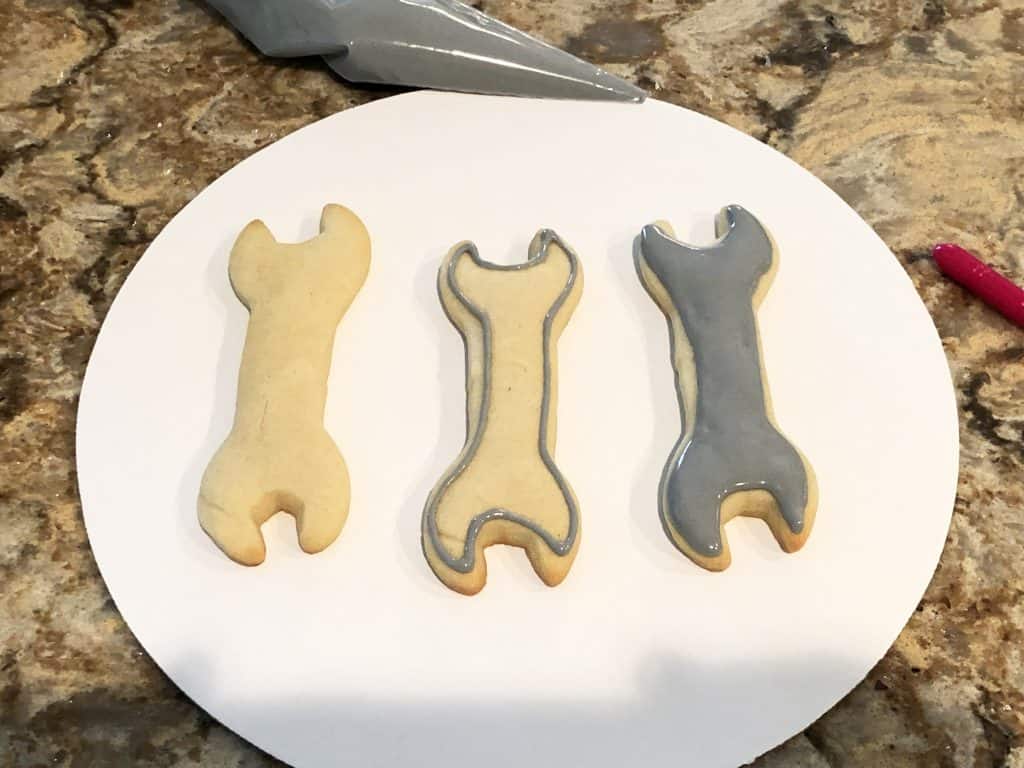
Again, let these dry overnight if you can.

Saw Cookies

For the saw cookies you will first use the gray royal icing at flooding consistency and decorate along the blade of the cookies. Let these sit for about 30 minutes.

The first steps to decorating a saw shaped cookie.

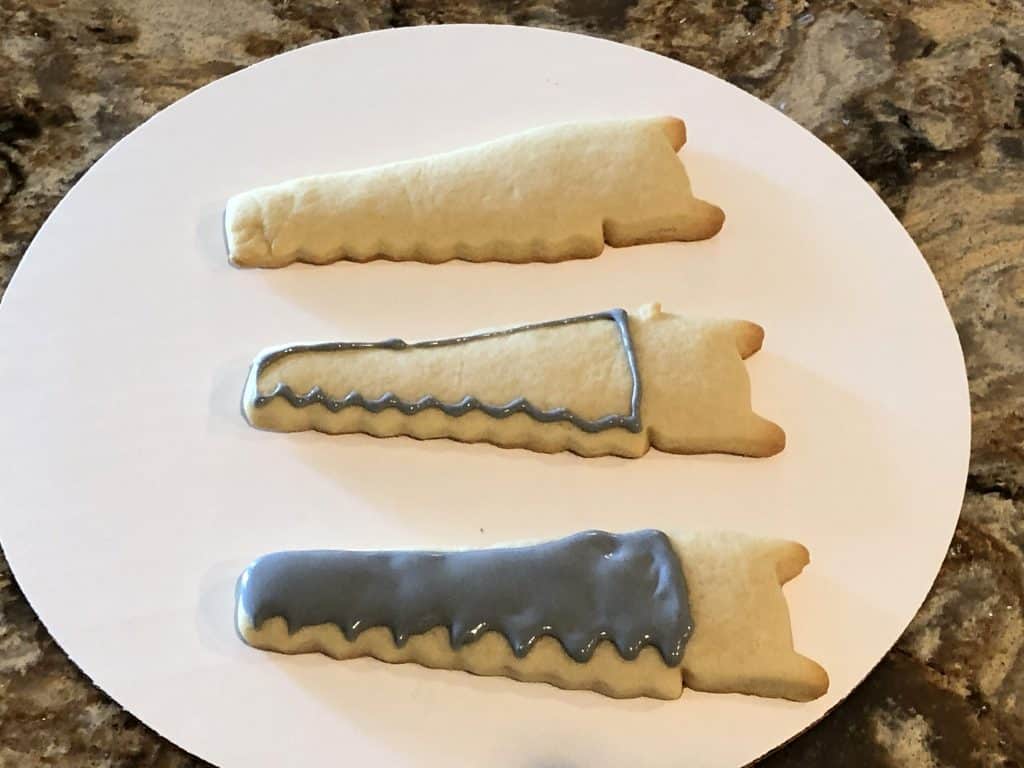
Then, you will use red flooding icing and decorate along the handle of the saw, leaving a hole in the center.

Decorating the red handle of the saw cookie

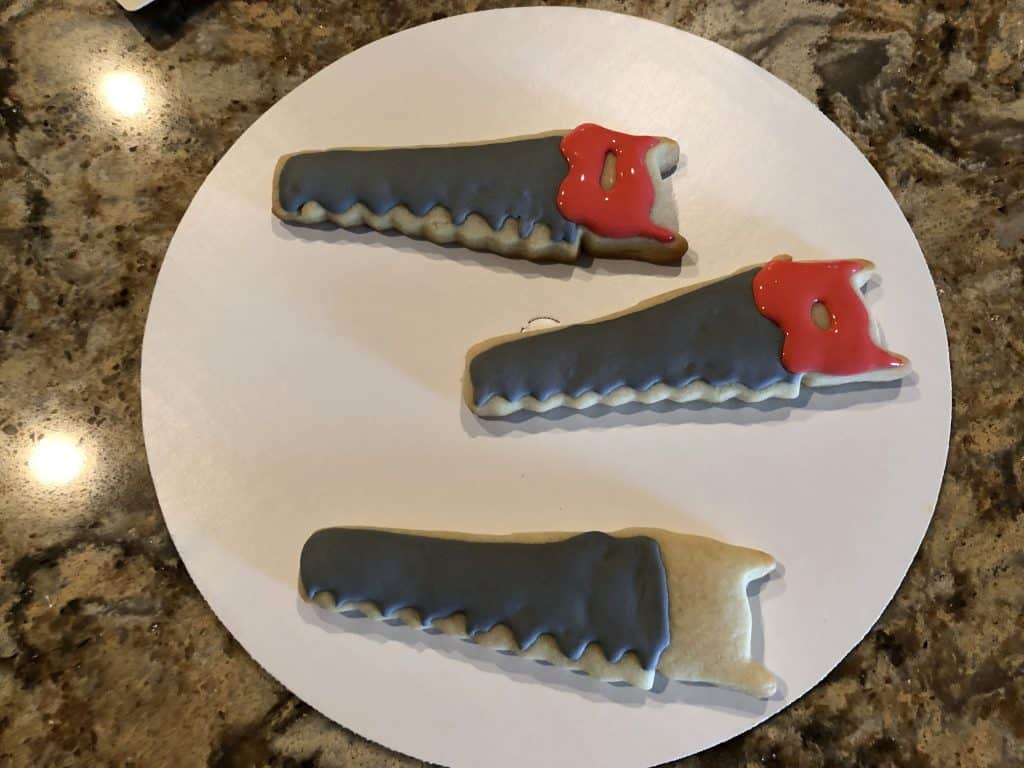
Then, let these cookies dry overnight to make sure the royal icing gets hard.

Decorating Pliers Shaped Cookies

Another fun tool shaped cookie to decorate are the pliers! The first thing you will do is use your gray royal icing and decorate one of the pliers teeth, and a portion of the handle (see photo for reference). Let this dry for an hour before moving on to the next step.

The first step to decorating the pliers cookies.

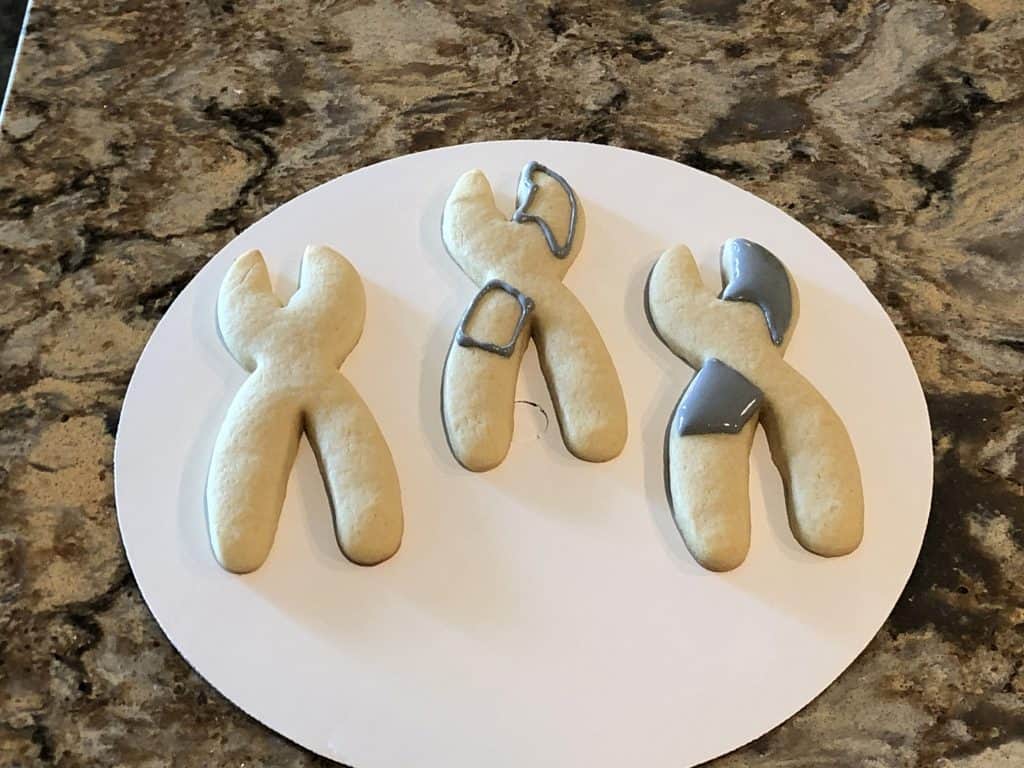
Then, add the gray royal icing along the other part of the pliers, keeping it lined up with where you stopped on the others side. Then, you will take the blue royal icing and decorate the handles up to the gray portion. Please see photo for reference.

Adding more detail to the pliers cookies.

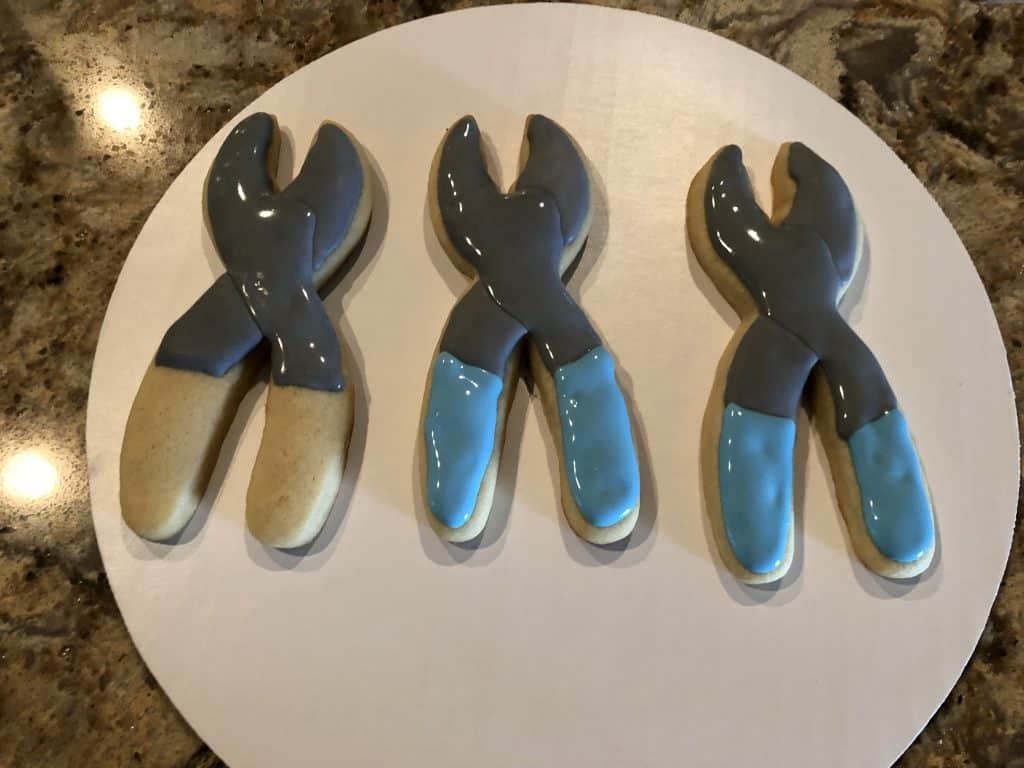
Let these dry overnight, and then you will add a small dot of gray royal icing to the center of the pliers. This will dry rather quickly.

Finished tool cookies that have been decorated

Screw Driver Cookies

The final cookies you can make for your complete tool set are the screw drivers. You will start out by using yellow or red and decorating the center ring (see photo).

First step to decorating the screwdriver cookie is to decorate the center ring.

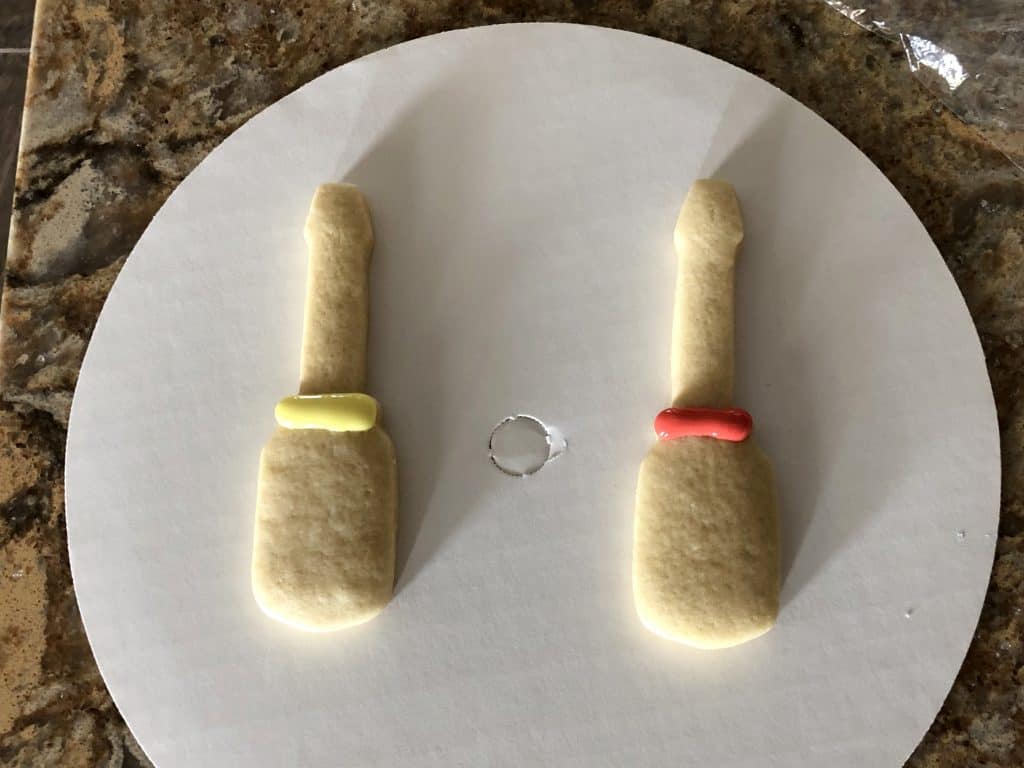
Then, using the gray royal icing, decorate the screw driver, and also a small section just below your yellow or red ring.

Adding more detail to the decorated screwdriver cookies

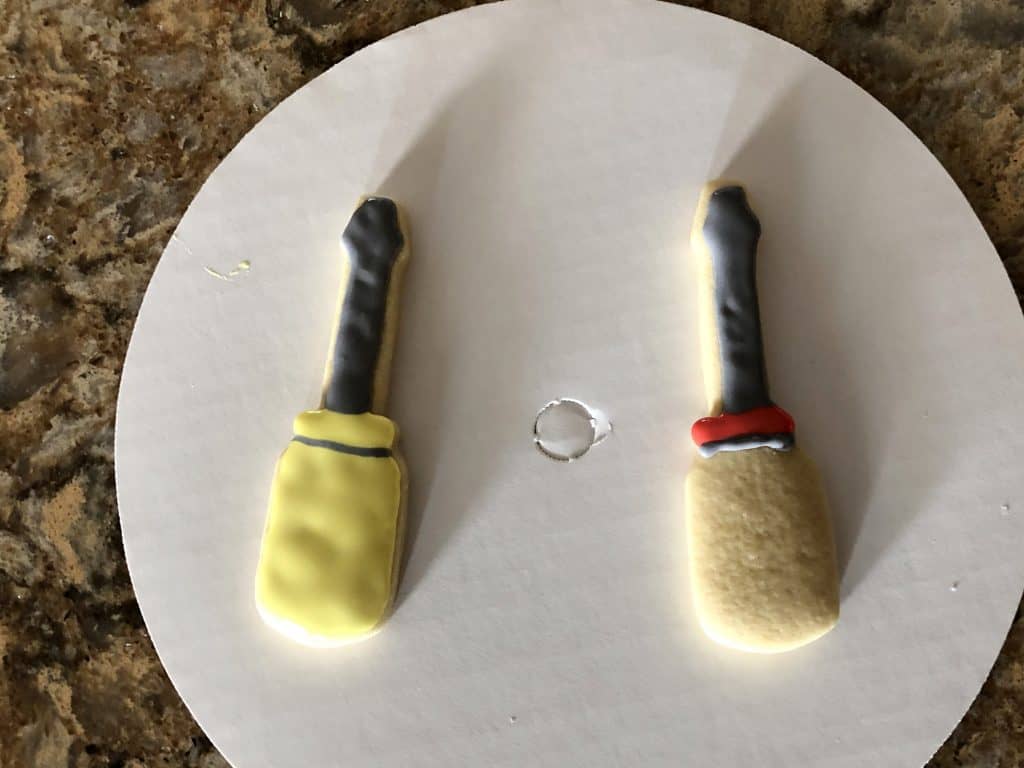
Finally, you will fill the bottom part of the screw driver cookie handle in with the color you used on the center ring.

Finished screw driver cookies that are decorated with royal icing

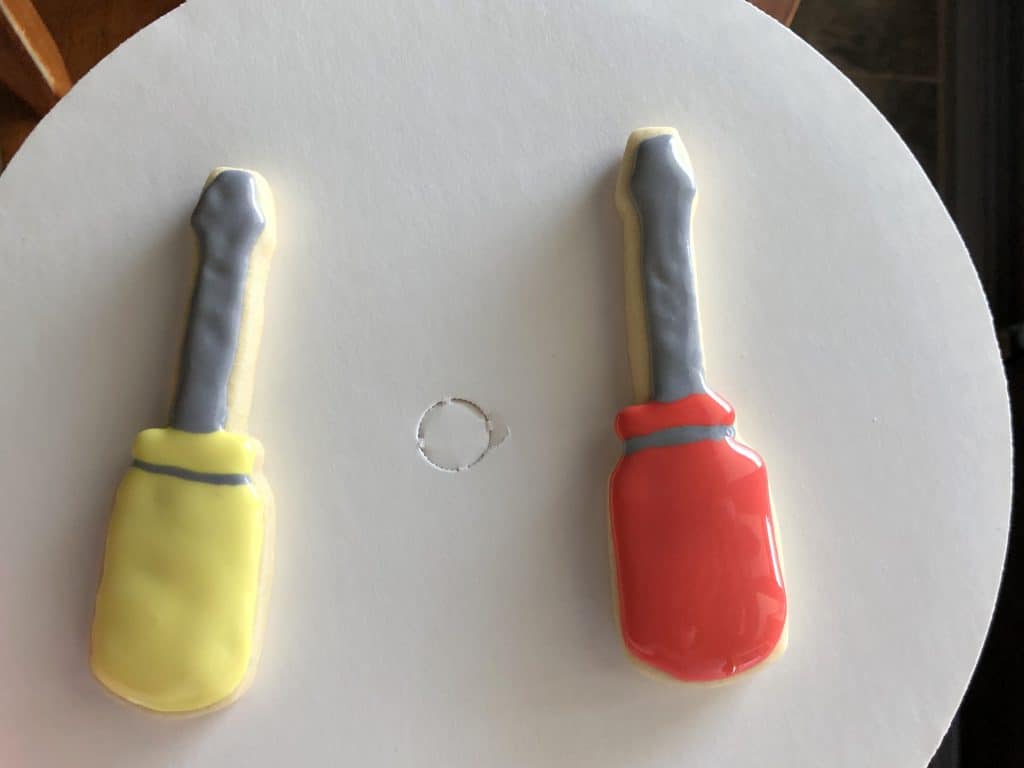
Let them sit overnight in an air tight container so the royal icing can harden. Then, enjoy!

Which tool cookie is your favorite? Let me know in the comments below! Also, make sure to share these on Pinterest so you can try them for yourself. 🙂

Sharing is caring!

  • Facebook
  • Twitter
  • LinkedIn
  • Yummly
  • Flipboard
  • Mix
  • Email

Reader Interactions

Leave a Reply Cancel reply

Your email address will not be published. Required fields are marked *

Recipe Rating


Primary Sidebar

Joanna the author of mom with cookies

Hi, I'm Joanna! Mom and baking connoisseur. I develop easy recipes that anyone can make, especially busy moms with fussy eaters. While desserts are my specialty, I have recipes for every thing!

More about me →

Easter Brunch Recipes

  • a delicious stack of french toast on a plate.
    The ULTIMATE French Toast Recipe
  • Easy breakfast potatoes
    Breakfast Potatoes Recipe
  • raspberry mousse in pink ramekins
    Raspberry Mousse Recipe
  • strawberry crisp with a few fresh strawberries beside it
    Easy Strawberry Crisp Recipe
  • a slice of no bake raspberry cream pie with fresh raspberries on top
    No Bake Raspberry Cream Pie
  • a breakfast tray carrying freshly baked banana nut muffins
    Easy Banana Nut Muffins

Top Recipes this Month

  • a slice of no bake peanut butter pie with drizzled melted peanut butter on top
    No Bake Peanut Butter Pie
  • sliced pineapple banana bread on a breakfast tray
    Hawaiian Pineapple Banana Bread Recipe
  • homemade strawberry lattice pie
    Strawberry Pie With Frozen Strawberries
  • collage of homemade Italian herb and cheese bread
    Italian Herbs and Cheese Bread
  • close up image of the bierock that was cut open
    Homemade Bierocks Recipe (Hamburger and Cabbage filled rolls)
  • homemade pumpkin bread sliced with brown butter frosting on top
    Delicious Pumpkin Bread Recipe

Features

collage of places Mom with Cookies has been featured in including huffiest yahoo chowhound today food club and yummly

Footer

↑ back to top

Connect

  • Contact
  • Sponsor

About

  • About Me
  • Accessibility

Legal

  • privacy
  • disclosures/advertising

Posts within this website may or may not contain affiliate links. You can read more on affiliate links on our disclosure page. Mom With Cookies is a participant in the Amazon Associates Program.

Copyright © 2017-2021 Mom with Cookies

Mom With Cookies
Powered by  GDPR Cookie Compliance
Privacy Overview

This website uses cookies so that we can provide you with the best user experience possible. Cookie information is stored in your browser and performs functions such as recognising you when you return to our website and helping our team to understand which sections of the website you find most interesting and useful.

Strictly Necessary Cookies

Strictly Necessary Cookie should be enabled at all times so that we can save your preferences for cookie settings.

If you disable this cookie, we will not be able to save your preferences. This means that every time you visit this website you will need to enable or disable cookies again.