
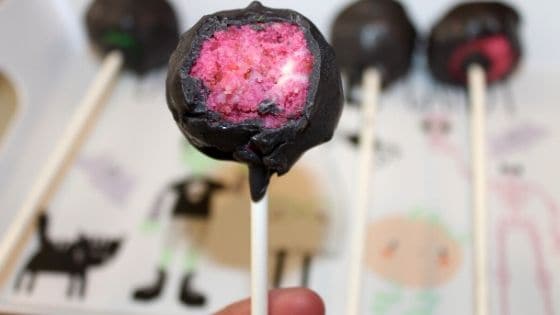
Cake pops are such a delicious treat. After a lot of trial and error, I have perfected the process of just how to make these fun cake pops.
In an effort to fully disclose this article contains affiliate links for products I used. This means if you purchase something, I would receive a commission. For more information, please see my disclosure page.
Insider Cake Pop Secrets
There are a few secrets to know when it comes to making these so they turn out just as good (if not better) than store-bought ones.
- Don't put too much icing in with the cake. The goal is to add just enough so that the crumbled cake holds itself together. Add too much will result in a weird texture of cake pops.
- Mix the crumbled cake and icing with your hands. This goes back to the first tip, because mixing it with your hand will help you feel when it's at the right consistency. This will then help keep you from adding more icing than you need.
- Place cake pops in freezer until right before dipping in candy melts. The cold cake pops will help result in a smoother cake pop finish. Also, it helps keep your cake pop from breaking into your candy melt.
- Add a little bit of liquid cooking coconut oil or vegetable oil to your candy melts BEFORE melting. This helps it melt smoothly and stay melted longer. I typically use ½ tablespoon of liquid cooking coconut oil to about 1 cup of candy melts.
How to make cake pops
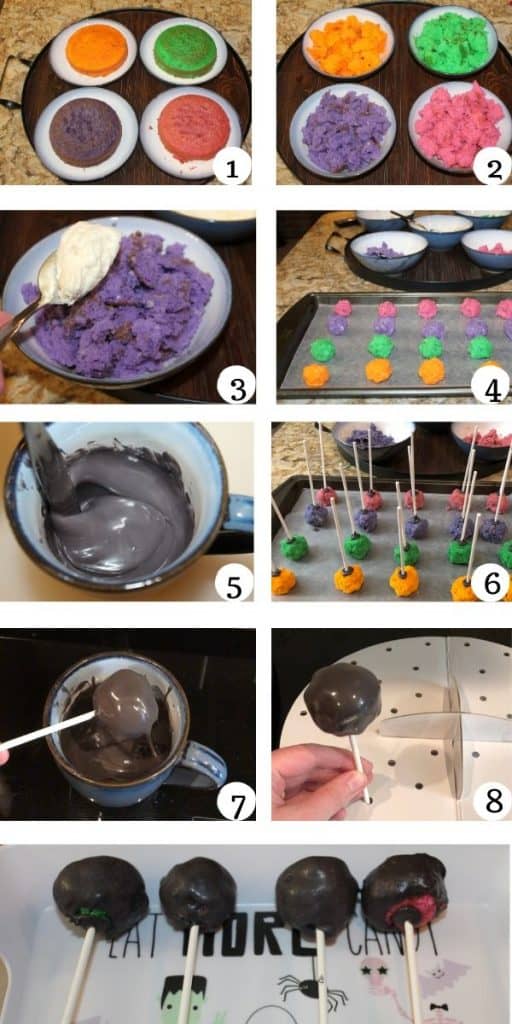
1. Bake your cake like the recipe or boxed cake mix instructs you. Then, let the cake cool completely. This is important because if it's still warm, the cake won't crumble but squish into pieces.
2. Crumble the cake. It's okay to have big crumbles or chunks.
3. Add in your icing. Start off slow, you can always add more icing, but if you add too much, the consistency will be kind of soggy. Using your hands, work the icing into your cake crumbles. It gets a little messy, but this is the best way to ensure you don't add too much icing.
4. When the cake and icing starts to hold together, you can then form cake balls. I use my hands or a cookie dough baller if I want them all to be the same size.
5. Then, melt your candy melts and coconut oil together. Start with 30 second intervals stirring between each time. You want to have a smooth consistency like syrup.
6. Then, dip your cake pop stick into the candy melt. Immediately place this into one of the prepared cake balls. Then, place this in the freezer. Repeat until all the cake balls have sticks in them.
Reheat your candy melt mixture as needed to ensure it stays melty and smooth.
7. Remove one of the cake balls from the freezer and dip it into the candy melts. Pull it out immediately and slowly turn the cake pop (still facing down) while you let the excess drip off. This is also the time to add any sprinkles if you wanted them.
8. Place the finished cake pops in a cake pop stand to let them harden or you can use cup and place just one cake pop in it to let it harden.
Repeat until all the cake pops have been dipped in candy melts.
Once all the cake pops harden, you can then pipe some melted candy melt onto them for added decoration or leave them plain.
How long will cake pops last?
It all depends on your icing. If you use cream cheese icing, place them in the refrigerator in a ziplock bag and they will last about a week.
If you used buttercream icing, you can keep them at room temperature for about 2-3 days in a ziplock bag.
Personally, I always refrigerate whatever isn't eaten right away.
If you a making these before a party, keep them in the refrigerator until about 30 minutes before serving so they aren't super cold.
My favorite cake pop icing
Everyone will have their one preference, but my favorite icing to use with cake pops is cream cheese icing. The nature of cake pops is that they are sweet, sometimes too sweet. With cream cheese icing, it cuts out the sweetness just a tad.
Here's my recipe for making my cream cheese icing:
- 4oz cream cheese
- 3 tablespoon butter (softened)
- ½ cup powdered sugar
- ½ teaspoon vanilla
Mix these ingredients together until smooth for about 5 minutes.
Items you might need to make cake pops
Thanks for stopping by! If you found this tutorial helpful, please remember to pin it to your favorite food board. Thanks!!
Leave a Reply